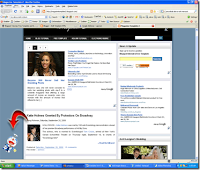
Bước 2: Đăng nhập vào tài khoản của bạn, chọn Edit HTML, nhớ chọn Expand Widget Tempplates, tìm dòng ]>></b:skin>, đặt đoạn code sau đây vào phía trên nó:
__________________________________________________________________________
#top_image {
position:fixed;
_position:absolute;
bottom:5px;
left:5px;
clip:inherit;
_top:expression(document.documentElement.scrollTop+
document.documentElement.clientHeight-this.clientHeight);
_left:expression(document.documentElement.scrollLeft+ document.documentElement.clientWidth - offsetWidth); }
position:fixed;
_position:absolute;
bottom:5px;
left:5px;
clip:inherit;
_top:expression(document.documentElement.scrollTop+
document.documentElement.clientHeight-this.clientHeight);
_left:expression(document.documentElement.scrollLeft+ document.documentElement.clientWidth - offsetWidth); }
Bạn có thể thay đổi giá trị màu đỏ theo ý của mình.
Tiếp tục tìm đến thẻ </body>, đặt code sau ở phía trên nó:
<div id='top_image'>
<img border='0' src='<img border='0' src='http://i117.photobucket.com/albums/o70/Babothanlong/icon3.gif?imgmax=800'/>
</div>
________________________________________________________________________<img border='0' src='<img border='0' src='http://i117.photobucket.com/albums/o70/Babothanlong/icon3.gif?imgmax=800'/>
</div>
Nhớ thay đoạn code:
<img border='0' src='http://i117.photobucket.com/albums/o70/Babothanlong/icon3.gif
thành địa chỉ hình của bạn.
Cuối cùng save template để xem kết quả!


0 nhận xét